First time using Protopasta Carbon Fiber HTPLA? Or maybe you've already discovered this excellent material and want to improve your printer's performance? It can be challenging, but with these tuning techniques and a little patience, you will be able to print stronger, more accurate, and precise parts.
The typical consumer 3D printer is a very complicated process packaged in a friendly-looking machine. Although we wish that achieving the advertised results was as simple as just hit "print!" unfortunately, It's not :( What we are shown can be misleading because as soon as your printing experience doesn't go how you envisioned it, it's easy to give up on cool and super fun materials that may require a little more tweaking to get the same results as standard PLA.
It's important to understand that almost all materials are different and your printer might need a little push in the right direction. So this is where tuning comes in. Tuning your printer is a process of printing, measuring/recording, and changing one variable at a time until your printer outputs noticeably better parts. Continue reading this blog, and with a little patience, you will save yourself from a lot of frustration in the future! Trust us, we’ve been there!
We focused on the tuning process for our Ultimaker 2+ with Cura's stock PLA profile but follow these steps for tuning on any printer and slicer you prefer.
At Protopasta we like to start with a simple box. Don't worry we made one you can download from our Thingiverse page (100mm Box Download). A simple 100mm box holds much more power than you think! It will help us solve the puzzle of tuning your printer.
The point of the box is to be able to measure wall width and visually see defects to correct where the print settings need improvement. Once you have downloaded the 100mm box go ahead and open the STL in your favorite slicer. Since we're using Cura, we opened the provided standard PLA settings to have a firm foundation to build off. To do this, we will need a single perimeter box with 0 top and bottom layers. Change the infill to 0% and the wall line count to 1. (If we can isolate single extrusion in a controlled environment, we can analyze and understand each line our printer lays down.)

All printers have different constraints and hardware limitations so not every material you put through it is going to act exactly the same. To find how the Ultimaker reacts to carbon fiber, we will run a series of test kind of like the printer is our patient and we need to diagnose its issues to find a cure.
Speed Test
The first test is to find how fast and how slow our printer can produce a steady result. We will do this to make sure our printer can handle the speeds our slicer throws at it. Starting with a 100mm box, we identified the preset speeds in our slicer. To keep everything as simple as possible we will only increase/decrease the speed up to the most drastic presets our slicer will reach.
As you can see by the picture the minimum/slowest speed our slicer will reach is 20mm/s and the maximum/fastest is 50mm/s. (note that when printing a box with 1 perimeter the printer will only be using the "outer wall speed". Our slicer is set to 30mm/s)

Even though our slicer is only going to print from 20mm/s to 50mm/s we tested print speeds from 10mm/s to 60mm/s to ensure we create a good result if our printer has a few errors.
To accurately measure speeds throughout the 100mm box we will be changing the speed directly from the printer as a percentage. Since our box started with a speed of 30mm/s for the outer wall, we decreased the speed multiplier to 66% to print at 20mm/s and 33% to print and 10mm/s. It's important to understand the minimum speed because if our printer runs to slow and extrudes to much plastic the combination can result in a jammed nozzle.
We noticed that our slicer has a minimum layer time setting and minimum speed setting that controls print speed based on how long it will take to complete a specific layer. These settings can be found under the cooling tab in Cura and its important to understand how they affect speeds throughout your print. Take a look at these setting before you start printing your box because it may cause your printer to print slower than your set speeds.

After testing our minimum speed, we increased the speed multiplier to 133% to print at 40mm/s and 166% to print at 50mm/s and so on... It's also important to understand our maximum speed because if we run faster than our printer is capable we end up with under extrusion and unwanted print artifacts.
To allow enough room to analyze each speed change, we increased or decreased the percentage every 3mm in the z-axis. At every speed change, we marked the height with a sharpie to decipher at what speed the printer started to produce a bad result.

Carbon fiber will act differently than PLA so we need to look out for specific problems our printer might have. By holding the 100mm box into the light we noticed that the print wall developed tiny holes and little inconsistencies all throughout the box and additional inconsistencies related to under extrusion at increasing speeds. To record and combat this problem we made a chart to keep track of what speeds produced good results. (below)
(✔= Good, ✔/X = Decent, X = Bad)

The next step is to find what caused the inconsistencies in our print. In the past, we found that temperature greatly impacts the extrusion quality of carbon fiber so the second test we performed will test a wide range of temperature and show us if the extrusion quality changes throughout the box.
Temperature Test
After we found which speeds printed well and which ones didn't we performed the same 1 wall 100mm box test but this time we adjusted the temperature the same way we changed the speed. Protopasta recommends a range of temperatures for each of our materials, Carbon Fiber should print best at 195-225 but this all depends on your machine. Each and every printer is different and because they all use different hardware and different components, they will all react in their own unique way to the material you print with. Some printers will have trouble keeping up at 210°C when others will do just fine and that's because of their capability of melting plastic and volume flow rate but more on that in the future.
Since we started to see more imperfections around 50mm/s we thought that the Ultimaker's temperature might be falling behind and not able to keep up with the amount of plastic we were asking it to put out at that speed. To start, let's make sure we know how fast we're printing. Go back into the slicer and change the outer wall speed to 50mm/s. Once we had set a constant speed we determined the range of temperatures to test. Starting at 210°C we tested all the way to 240°C at increments of 5 degrees and marked the box with a sharpie every 3mm in the z-axis.
Tuning is all about comparing and contrasting the old versus the new, as we increase the temperature we'll have a more noticeable scale to identify where the temperature increase helped the print. By starting our temperature test at 50mm/s and 210°C, we will have an example of what errors the print had so we have a known starting point to base our results off.
(✔= Good, ✔/X = Decent, X = Bad)

As you can see by the chart not everything we do will solve our problem or increase the printer's capability but every step will give us insight and help us narrow down the list of possible problems. From 210°C - 240°C we saw no change in the prints inconsistency so we brainstormed other possible problems. In our blog Tuning for Carbon Fiber HTPLA on your Prusa MK3 or other 3D printer, we learned that material flow has a big impact on the extrusion quality. After taking this into consideration, we suspected that the root cause of under extrusion might be the size of Cura's preset extrusion width. Extrusion width is the width of the line the printer lays down, it may seem unimportant but not extruding enough material can greatly affect the quality of the print. In Cura, the extrusion width was set to .35mm which is smaller than our .4mm nozzle and may result in under extrusion.
Our next test will tell us if a wider extrusion width will increase the print quality and eliminate the inconsistencies we found.
Flow Test
Again using the same 100mm box test but this time adjusting flow.
To find a steady and reliable extrusion width, we will use the manual flow setting built into our printer the same way we adjusted the speed and temperature throughout the print. Our main idea was to steadily increase the flow as the box grew taller and mark the change in flow percentage. By marking the height at which we changed the flow rate we can then go back and inspect the wall of the box for inconsistency and be able to see where a change in flow increased the print quality.

Starting at 105%, we increased the flow every 3mm until 120%. Looking for inconsistencies throughout the box helped us to decipher the correct place to measure to find a wall width that gives us the best results. Once the print was finished, we held it under the light and could distinctly see the difference between flow rates and found that around 120% the wall became thick enough and extruded without any inconsistencies. We then measured the box where the wall was thick produced a good result and recorded a measurement of .5mm. Then we plugged that value back into Cura as our new target for extrusion width. 
As you can see in the image above we changed our extrusion width from .35mm to .5mm which was the value we measured at 120% flow. Now that we found a wall thickness that should give us a better result let's print another box to see how it impacts the print quality.
We printed one last box using our final draft of settings and tested the same speeds we did in the first speed test (10mm/s - 60mm/s). This is because we wanted to be thorough and make sure our printer produced steady results throughout all speeds during the print and our box provided evidence that proves consistency.
Remember when I said that tuning is all about comparing and contrasting the old vs. the new? Well, we set our very first box printed with standard Cura print settings next to our latest tuned and refined print just to see how impactful these few simple steps were, but we're not done yet! Even though the box looks great, we need to make sure it's accurate, meaning that the physical wall resembles the settings we put into the slicer. If the wall thickness is wider than .5mm, this can cause our printer to over extruder when printing parts with more than just 1 wall leading to jams. This is because the printer thinks it has more room to extrude that it actually does, causing the nozzle to clog over time.
When we measured our wall, it matched the slicer settings perfectly! Exactly .5mm! If your wall is bigger or smaller than the line width value in your slicer, then we recommend using the extrusion multiplier AKA "flow" to dial in the exact width. For example, if the wall measured to be .6mm instead of .5mm, turn the flow down until the wall thickness measures .5mm.
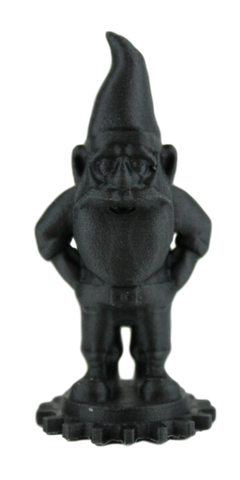
Now that we have a tuned profile for our Ultimaker 2+ let's see how our printer handles a few real application prints. We started by printing a small block with 100% infill to see how the printer lays down plastic on heaving infill parts. As you can see in the picture below the line spacing was nearly perfect which shows us we will never need to worry about jams caused by over extrusion. Just to see how precise we can get and because we think our printers new capability with carbon fiber is super cool we printed a few precision gears used in an extruder drive assembly. C'mon! How much better does it get? Just look at that picture! So, do you accept the challenge? Try to solve the puzzle for your printer and slicer! Just remember that changing one variable at a time will keep your tining process simple and easy! Let us know how your tuning experience plays out and how we can help to keep you printing beautiful masterpieces!
If you have an Ultimaker 2+ then you can download our tuned profile right now! Cura Profile Download If you're not familiar with the steps to importing a Cura profile click this link for more information! Managing Profiles
Keep an eye out for more content from Protopasta and look forward to new blogs based on teaching you how to get the most out of your printer!