When suggesting Carbon Fiber as a 3D printing material, nozzle wear is often the first concern. While it's important to be aware of nozzle wear, don't let it stop you from enjoying the benefits of heat-treated Carbon Fiber HTPLA. In the following article, we'll show you how to identify, replace, and adapt your 3D printer's nozzle to changing conditions.
By the way, you can absolutely use a stock, brass nozzle to print carbon fiber. It works! Will the nozzle wear more quickly than a harder, wear-resistant nozzle? Sure, so let's prepare you to replace your nozzle for printing with abrasive materials. Nozzle replacement doesn't have to be intimidating. Let's start by identifying nozzle wear.
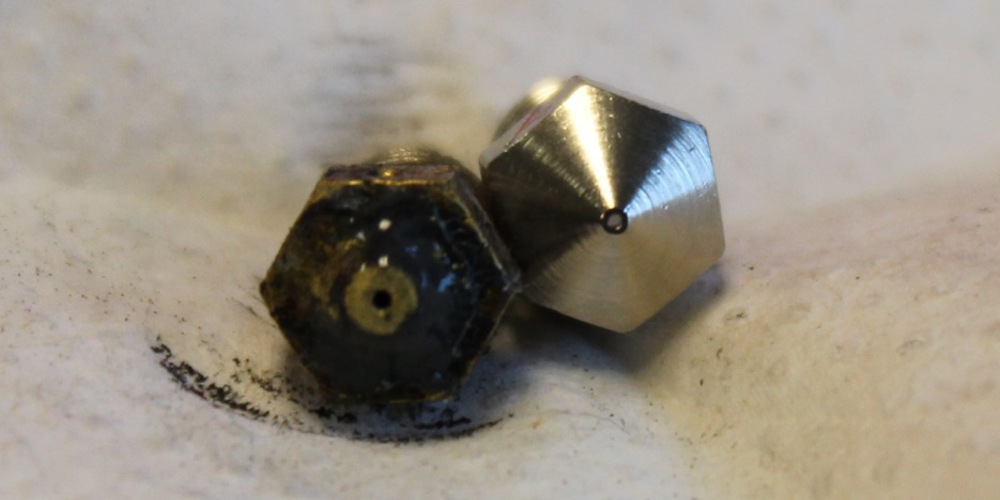
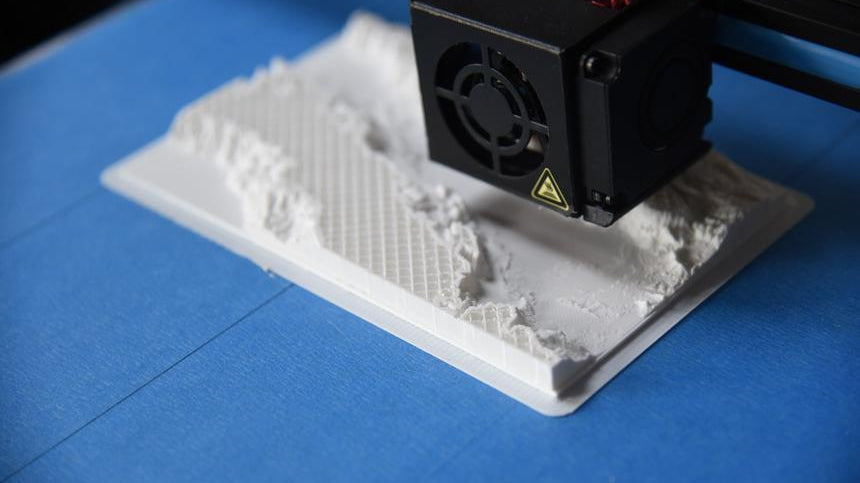
As a nozzle wears, the tip will flatten and the bore will increase (above). A 0.4 mm nozzle opening becomes larger to where 0.4 mm nozzle settings may no longer be appropriate. Extrusion quality decreases demonstrating rougher surface finish and missing material at the start of extrusion travel. Flattening of the tip will decrease your nozzle length and increase your first layer distance so you'll need to move your build platform closer to the nozzle. Even after adjustment, eventually your extrusion will likely stick to the flattened nozzle instead of your platform. It's time to replace your nozzle!

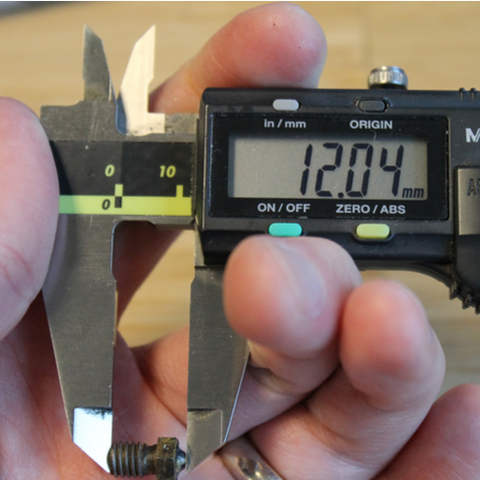
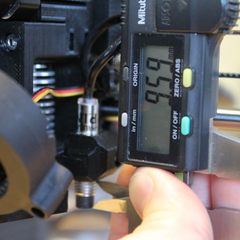
Before removing your worn nozzle, you'll want to preheat your machine. When heated, remove filament. Now carefully unscrew your nozzle. Doing this when hot takes the least force but please be careful to avoid burns. We like the above tool from Olsson to both save our fingers from burns and avoid over-torquing. When the nozzle is cool enough to handle, remove any plastic extending beyond the nozzle tip to accurately measure the nozzle length (below left).
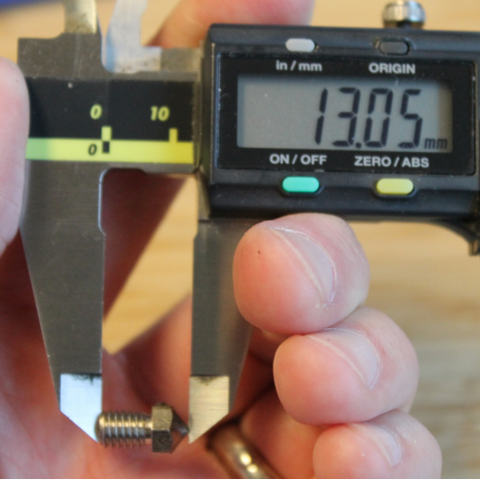
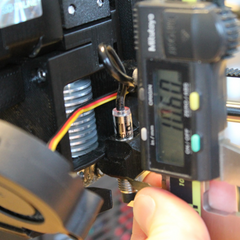
Before inserting the new nozzle, we can also measure it's length (above right). Comparing the nozzle lengths, we find the required platform distance change to retain the same first layer distance. In this case about 1 mm. Now carefully insert the replacement nozzle being careful not to cross thread or over-tighten the nozzle.

You can compensate for this new nozzle height in a number of ways. On our Prusa MK3 we adjusted the height of our P.I.N.D.A. probe by 1 mm to compensate for the 1 mm change in height (above). Note that 0.5 mm of change was from nozzle wear and 0.5 mm was from changing from an e3d to longer Micro Swiss style nozzle. After moving the probe 1 mm, no additional distance or first layer adjustment was needed.
First layers are a critical foundation to a print. The distance must be large enough to let enough material out of the nozzle to avoid jamming and be small enough that the material sticks to the platform. Please validate your changes by observing first layer and wall quality. Continued, regular validation will help track and adjust for changing conditions including wear!