
The Prusa MK3 and Proto-pasta HTPLA are an innovative combination, but getting a good result when 3D printing isn't always straight-forward. In this article, we'll share some practices and settings we found to improve reliability when printing with Proto-pasta HTPLA, including our sparkly glitters and metallics, on your Prusa MK3! To avoid jams, we'll focus on removing nozzle restrictions and defining an operating window for a window of opportunity. If you've experienced jams, you'll want to keep reading...
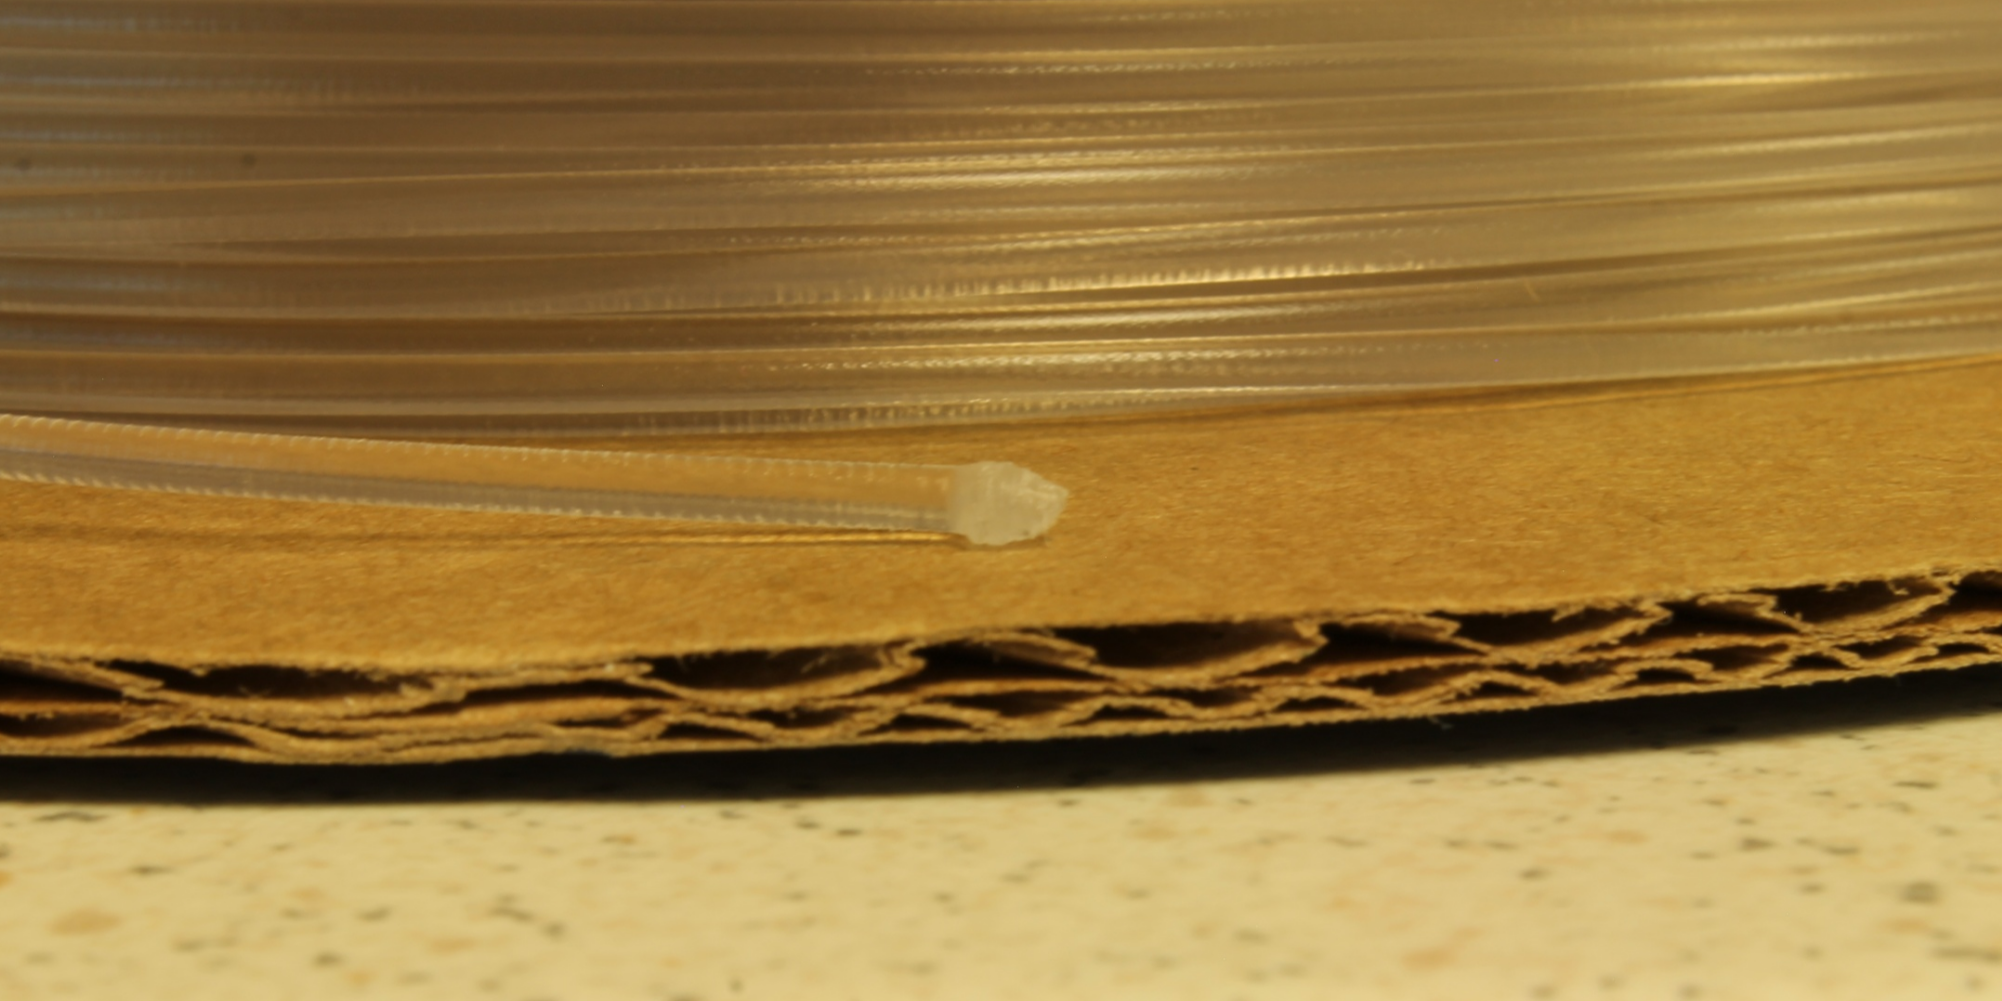
First, did you know HTPLA becomes more heat resistant when heat treated? Unfortunately, our MK3 hotend heat break seems to create heat treating conditions at default PLA temperatures. When idle for a few minutes, a firm plug (below) can form. This plug does not extrude at default PLA temperatures. Though an e3d hotend is standard on our Prusa, we don't get the same plug with the same conditions on our Big Box e3d hotend. Go figure. Fortunately, we found our MK3-specific plug easy to remove or overcome.
To remove the plug, back out the filament, remove the bulb from the filament end, and re-insert the filament. To push the plug through the nozzle, we increased nozzle temperature to 240 deg C. This higher-than-typical nozzle temperature seems to soften the plug enough for less-restricted extrusion. A little insight into why some folks have to print hotter than others with the same material (though print speed and extrusion rate are also likely contributors).
Another feature of the MK3 is it's powerful layer fan which can aggressively cool your print. Unfortunately, this fan also cools the nozzle, momentarily dropping the actual temperature more than 5 deg C below set point (see example below). During this temporary temperature drop, your material may be less melted. If not melted enough, this could affect print quality or worse, jam your nozzle.
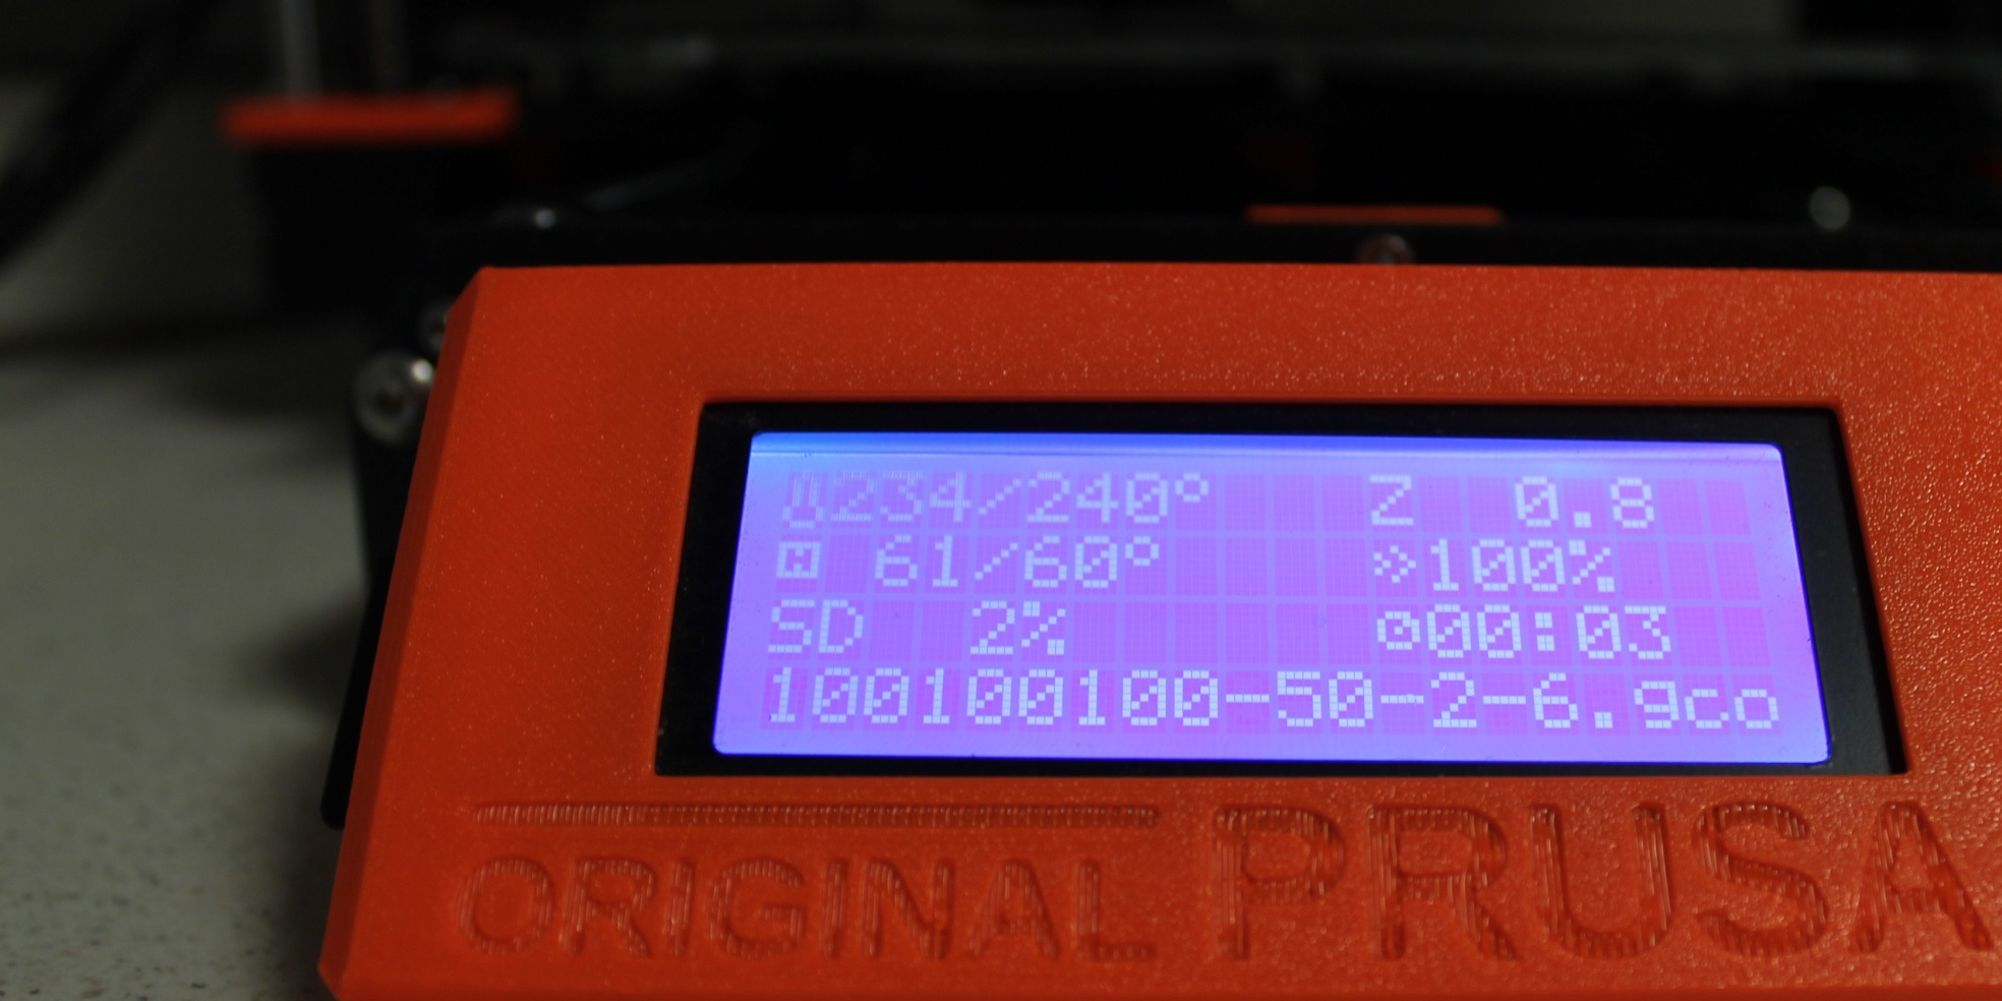
To mitigate risk, we recommend turning the fan on early in your print (while the resulting temperature drop can be observed like above), and then not changing fan speed or temperature settings throughout your print. A nozzle set point of 240 deg C for HTPLA on the MK3 specifically seems adequate, and though lower temperature set points may yield better looking prints with less artifacts, lower temperatures are increasingly risky in terms of jamming. And let's face it, your print looks worst when it jams before finishing.
So, how cold can you go? We don't know. Without modifying the hotend, I wouldn't recommend printing cooler than 240C if optimizing for reliability. A silicone sock, for example, may help print cooler, as it helps isolate and insulate the heater block to reduce unwanted cooling (below). With stable control of temperature set point, further limiting speed for both a higher minimum and lower maximum speed could allow colder printing at the sacrifice of process window. We don't know enough yet to make more condition-specific recommendations, but based on our exploration, there is some indication this could be true.

The MK3 claims speeds up to 200 mm/s. Speed potential is great, but just because a car can reach 200 mph in a straight line on dry pavement with e85 fuel, doesn't mean it can on a wet, curvy road with standard petrol. Conditions matter. Nozzle temperature must be paired with appropriate settings for a given material and hardware.
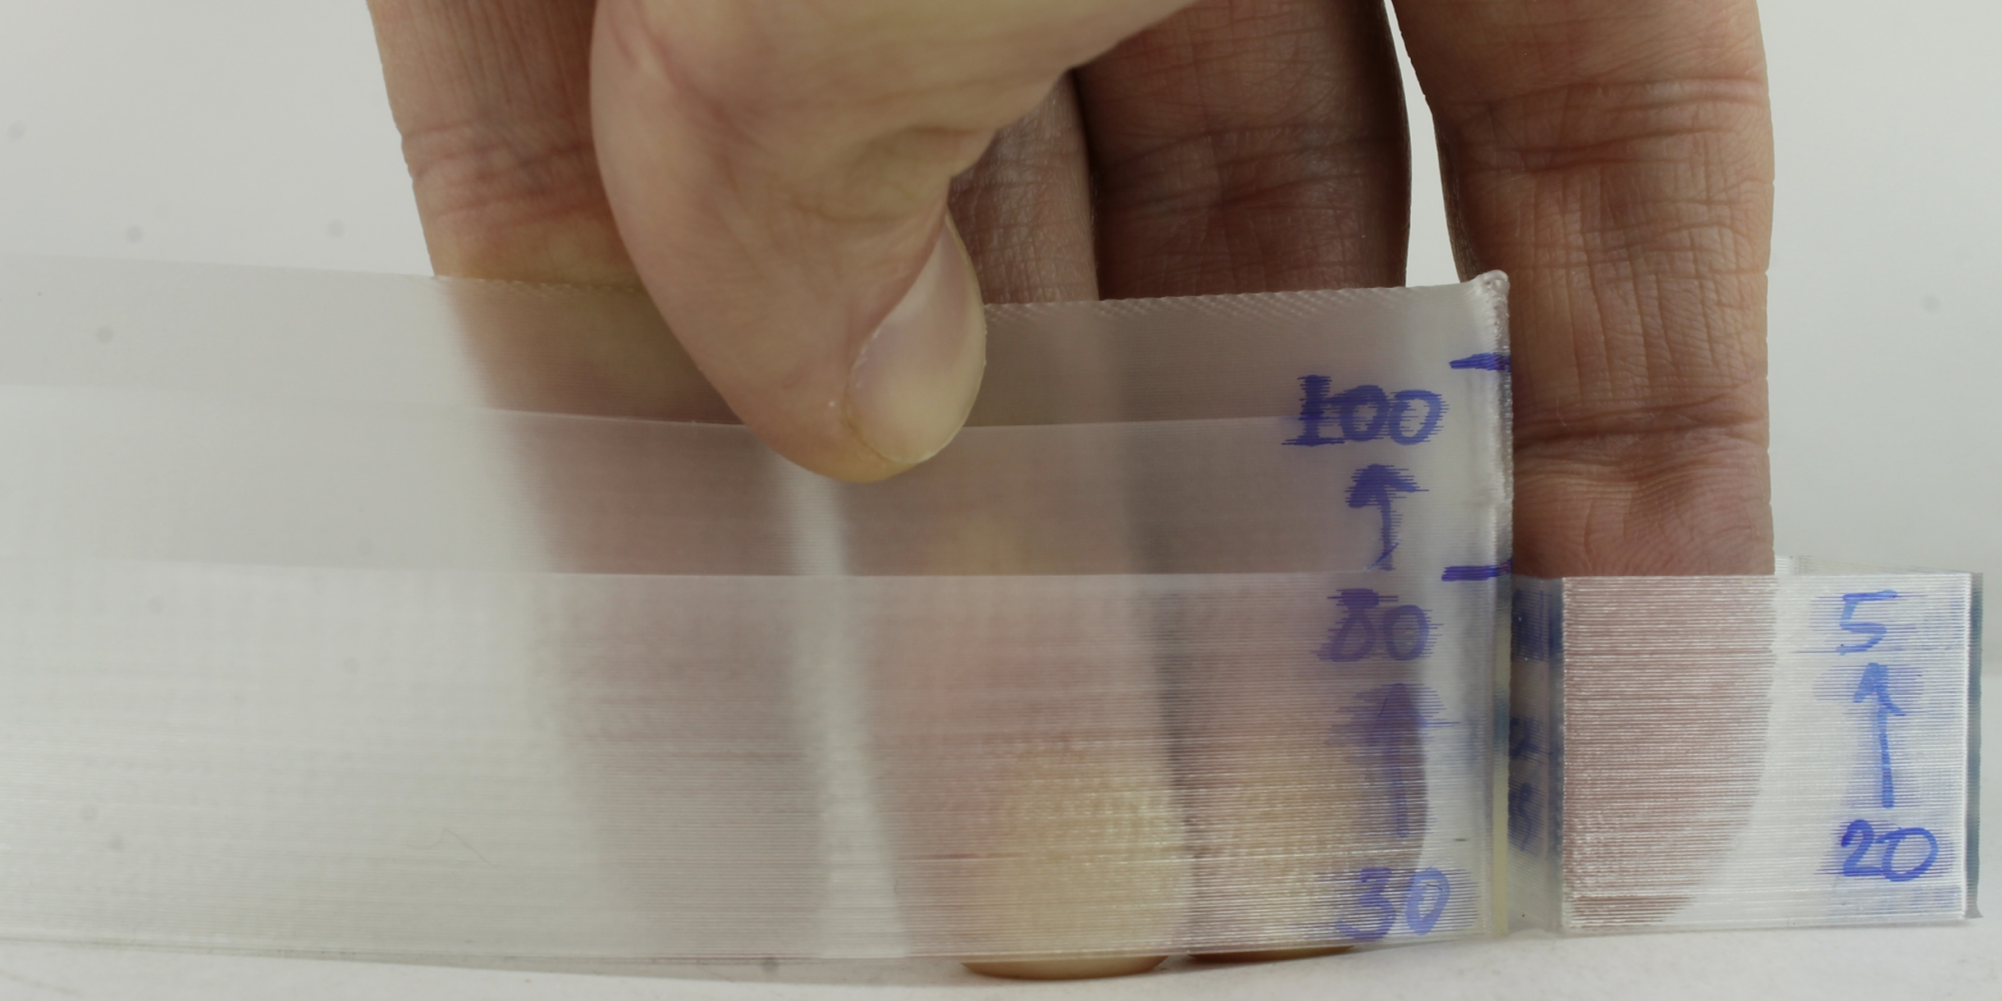
We varied speed with translucent Proto-pasta HTPLA on the Prusa MK3 in a typical office environment while holding all other settings constant. We started with R3 (B7) level hardware (please follow this link to learn more about this hardware revision level and why you should upgrade if your machine is not already at this level) including the standard 0.4 brass nozzle (with no sock). We chose a nozzle temperature of 240 deg C, a layer thickness of 0.20 mm, and an extrusion width of 0.70 mm. These parameters were chosen for a balance of productivity, detail, and extrusion quality on our MK3. Below is what we observed.

Holding layer thickness, extrusion width, and temperature constant at the above mentioned settings, we found a range of speeds, 10 to 65 mm/s, where the plastic appears clear and fully-melted without defects. 5 mm/s shows some inclusions. 70 mm/s and above demonstrate reduction in gloss and clarity. 85 mm/s and above show tendency towards splitting along part layers. Speeds 100 mm/s and above trend towards under-extrusion and jamming (though this may be accentuated by inadequate cooling).
We also found that layer times approaching 4 seconds or less did not have enough cooling to maintain a good quality. Knowing this, we'll want to limit our minimum layer time to 5 seconds to improve quality of layers with small cross-sections.
We applied the above variables and observations to create a sample Prusa MK3 slic3r profile for HTPLA. You can download this HTPLA MK3 slic3r profile config for import into Slic3r or download a PDF of Slic3r screen shots to make changes for yourself. Below are some sample Protognome prints with different variants of Proto-pasta HTPLA, including translucent HTPLA on the far left. You'll notice, while form is consistent, finish greatly influences perception. Download Protognome and try for yourself.

Some notable settings include a single 0.7 mm perimeter, 4 top/bottom layers, and 50% grid infill. Remember how I said, we'll focus on removing nozzle restrictions? These settings give plastic space and time to both extrude and cool rather than accumulate in the hotend for a jam. If you're still getting jamming within the first layers of your prints, you may need to remove further restriction with a first layer adjustment, extrusion flow calibration, or fine-tune to reduce your flow.
Are these settings perfect? No, but they help take control of some key variables that affect quality and reliability. My hope is these conditions are forgiving enough for favorable results with a variety of machines, states of tune, and HTPLA variants. In the future, we can explore fine tuning to optimize for improved finish, increased productivity, or mechanical properties with HTPLA. We may also propose specific settings for other HTPLA variants, materials, hardware, software, or specific applications.
A final note. What we observed above was on our specific Prusa MK3 courtesy of the 3D Printing Nerd, Joel Telling, and in support of us gaining experience in processing our Proto-pasta materials on the MK3. Joel was the first to share experience with increasing nozzle temperature to avoid jamming with us. For all this we are grateful. I appreciate the opportunity to learn about and get to the bottom of this issue. Thanks to Joel and Joe Prusa for a mostly wonderful machine with an approachability and tuneability any tinkerer can enjoy. The challenge becomes resisting tinkering. Our results are condition dependent and your experience may vary.
Good luck, have fun, and happy printing!
