

Replacing traditionally machined parts with 3D printed ones sounds like a far-fetched idea, but is it?
Subtractive technologies like CNC milling have long been taken seriously in creating functional parts for consumer hobbyists to large-scale industrial manufacturers but additive manufacturing's cred and capabilities are catching up. With advanced materials available for 3D printers like Proto-Pasta’s Carbon Fiber HTPLA, the applications for 3D printing have expanded to include more functional use.
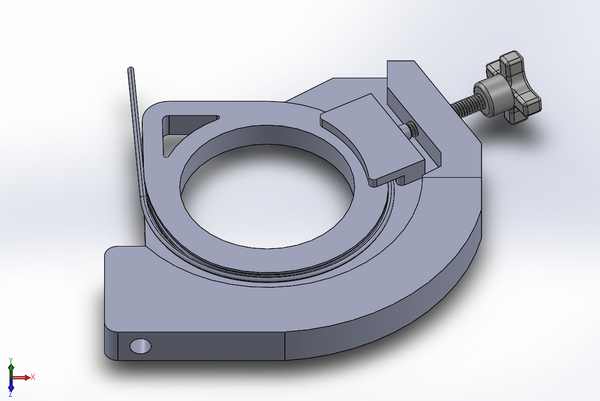
At Protoplant, we create custom solutions to provide the best possible 3D printing experience to our customers. Our most recent addition to our shop floor is a tensile strength tester that we call Thwing (below). Thwing looks like he was around when the dinosaurs first roamed the earth so we've been working on a few upgrades to modernize him. Since Thwing's main use will be to test filament, we had to design some custom, application-specific grips to securely hold the filament in place when testing.

A two-for-one deal, we'll both test our material in the application of printed grips and pull-test our filament. Tensile testing filament will give new insight into filament performance for improved material characterization which can further improve our products!
This blog gives insight into you how we designed, iterated, and adapted a 3D printed part to take the place of a machined part in a mechanical application. Our goal was to design filament grips so their geometry could easily be machined out of aluminum to create end-use parts, but we started by prototyping using 3D printing.
We 3D printed our first prototypes to iterate form and quickly improved our design. To produce the printed parts we chose Proto-Pasta Carbon Fiber HTPLA for it's characteristic strength and rigidity. Although 3D printing was only intended for prototyping, we decided to put our prototypes to the test functionally. We found the 3D printed carbon fiber prototypes were able to function as end-use parts when testing the tensile strength of filaments! How cool is that?
This unexpected, but awesome result demonstrates how 3D printed carbon fiber can fill a mechanically-demanding application for reduced cost and time. Continue reading for more about what we learned!
Breaking Filament with Filament
When modeling our 3D printed part, we based every design aspect off the definition of a rigid body. A rigid body is a body which does not deform under load. For strength and rigidity, we immediately reached for carbon fiber. After printing and testing, we found printed parts were able to withstand the force required to break filament.
Complimenting Additive with Subtractive Techniques
In this application, it's necessary to securely fasten our printed part to the tensile tester. To do this we added threads to the printed part. Instead of adding threads to the model, we “tapped” into the tried and true methods of hand tapping after the print was finished. Our hope was to create stronger, more accurate threads using this technique.
Not knowing if tapping 3D printed parts would work well, we performed a few tests that ended with surprisingly good results.


What we found when comparing Carbon Fiber (left) to standard HTPLA (right):
- Carbon fiber threads are cleaner. Carbon fiber's rigidity and hardness allowed for a crisp cut. Threads looked precise and well-formed. This should give a good fit with plenty of material for the best possible strength and rigidity in place on Thwing.
- Carbon fiber threads are more reliable. Not only do the threads look better, but the tap is more reliably guided through the center of the bore. We found the HTPLA without carbon fibers more challenging to guide straight, resulting in poorer form and function. When hand taping non-carbon fiber threads, the tap ran so far off-course that the threads were not usable.
-
Carbon fiber is a professional solution. Not only does carbon fiber lend itself to great threads, it looks great doing so! It's textured, low gloss surface hides surface defects. Layer lines and artifacts found on the surface of a 3D printed part start to disappear. Carbon also presents a very desired black (or gray) finish. Check out our new shades of gray in our Carbon Fiber Collection!

Cost and Time of 3D Printing Vs. Machining
So where do you draw the line between printing and machining? 3D printing has it's own unique set of strengths and limitations like any form of manufacturing, but we can start by giving 3D printing a chance.
3D printed parts are much less expensive than traditionally machined parts which let us to keep the cost down and the product-creation process moving! Having in-house 3D printing capabilities allowed us to design, test, iterate, and repeat all in one day until a final end-use part was formed.
Below are two simple charts showing the cost/time difference between 3D printing and machining. The charts compare in-house 3D printing with Proto-Pasta Carbon Fiber HTPLA and out-of-house machining from Protolabs.
Cost & Time to 3D Print Prototypes and Final Parts:
| Design Step | Number of Parts Manufactured | Cost of Material | Time to Print |
|---|---|---|---|
| Iteration 1 (3D Printed Prototype) | 1 | $20 | 1 Day(s) |
| Iteration 2 (3D Printed Prototype) | 1 | $20 | 1 Day(s) |
| Iteration 3 (3D Printed End-use Part) | 2 (Top/Bottom) | $40 (Cost of 2 Parts) | 2 Day(s) |
| Total (Parts, Cost, Time) | 4 | $80 | 4 Day(s) |
Cost and Time to 3D Print Prototypes and Machine Final Parts:
| Design Step | Number of Parts Manufactured | Cost of Material | Time to Print |
|---|---|---|---|
| Iteration 1 (3D Printed Prototype) | 1 | $20 | 1 Day(s) |
| Iteration 2 (3D Printed Prototype) | 1 | $20 | 1 Day(s) |
| Iteration 3 (3D Printed Prototype) | 1 | $20 | 1 Day(s) |
| Iteration 4 (3D Printed Prototype) | 1 | $20 | 1 Day(s) |
| Out of House Manufacturing (Machined) | 2 (Top/Bottom) | $1,274.12 (Cost of 2 Parts) | 1 Week(s) |
| Total (Parts, Cost, Time) | 6 | $1354.12 | 1 Week(s) , 4 Day(s) |
Work smarter, not harder, right? We were able to update Thwing with Carbon Fiber HTPLA grips as our final, functional solution! This saved us about a week of valuable time and $1,274.12 of unnecessary machining cost. With the savings from just one small project like this, we've paid for our 3D printer and opened the door to future opportunity! How will you use 3D printing?
Sure, this is only one application where the requirements were favorable for replacement of machining with 3D printing. In many cases, machining will still be the right solution for end-use parts, but as you see, 3D printing Carbon Fiber can be seriously useful. Hopefully this article got you thinking about new ways you might approach your next project.
Well, since we didn't break the bank, let's celebrate by breaking some filament!
